Adobe Illustrator is a powerful tool for graphic designers and creatives alike. However, sometimes you may encounter a situation where a font you need is missing from the program. In this step-by-step guide, we’ll walk you through the process of installing a missing font in Adobe Illustrator, ensuring you have access to all the fonts you need for your projects.
Step 1: Identify the Missing Font
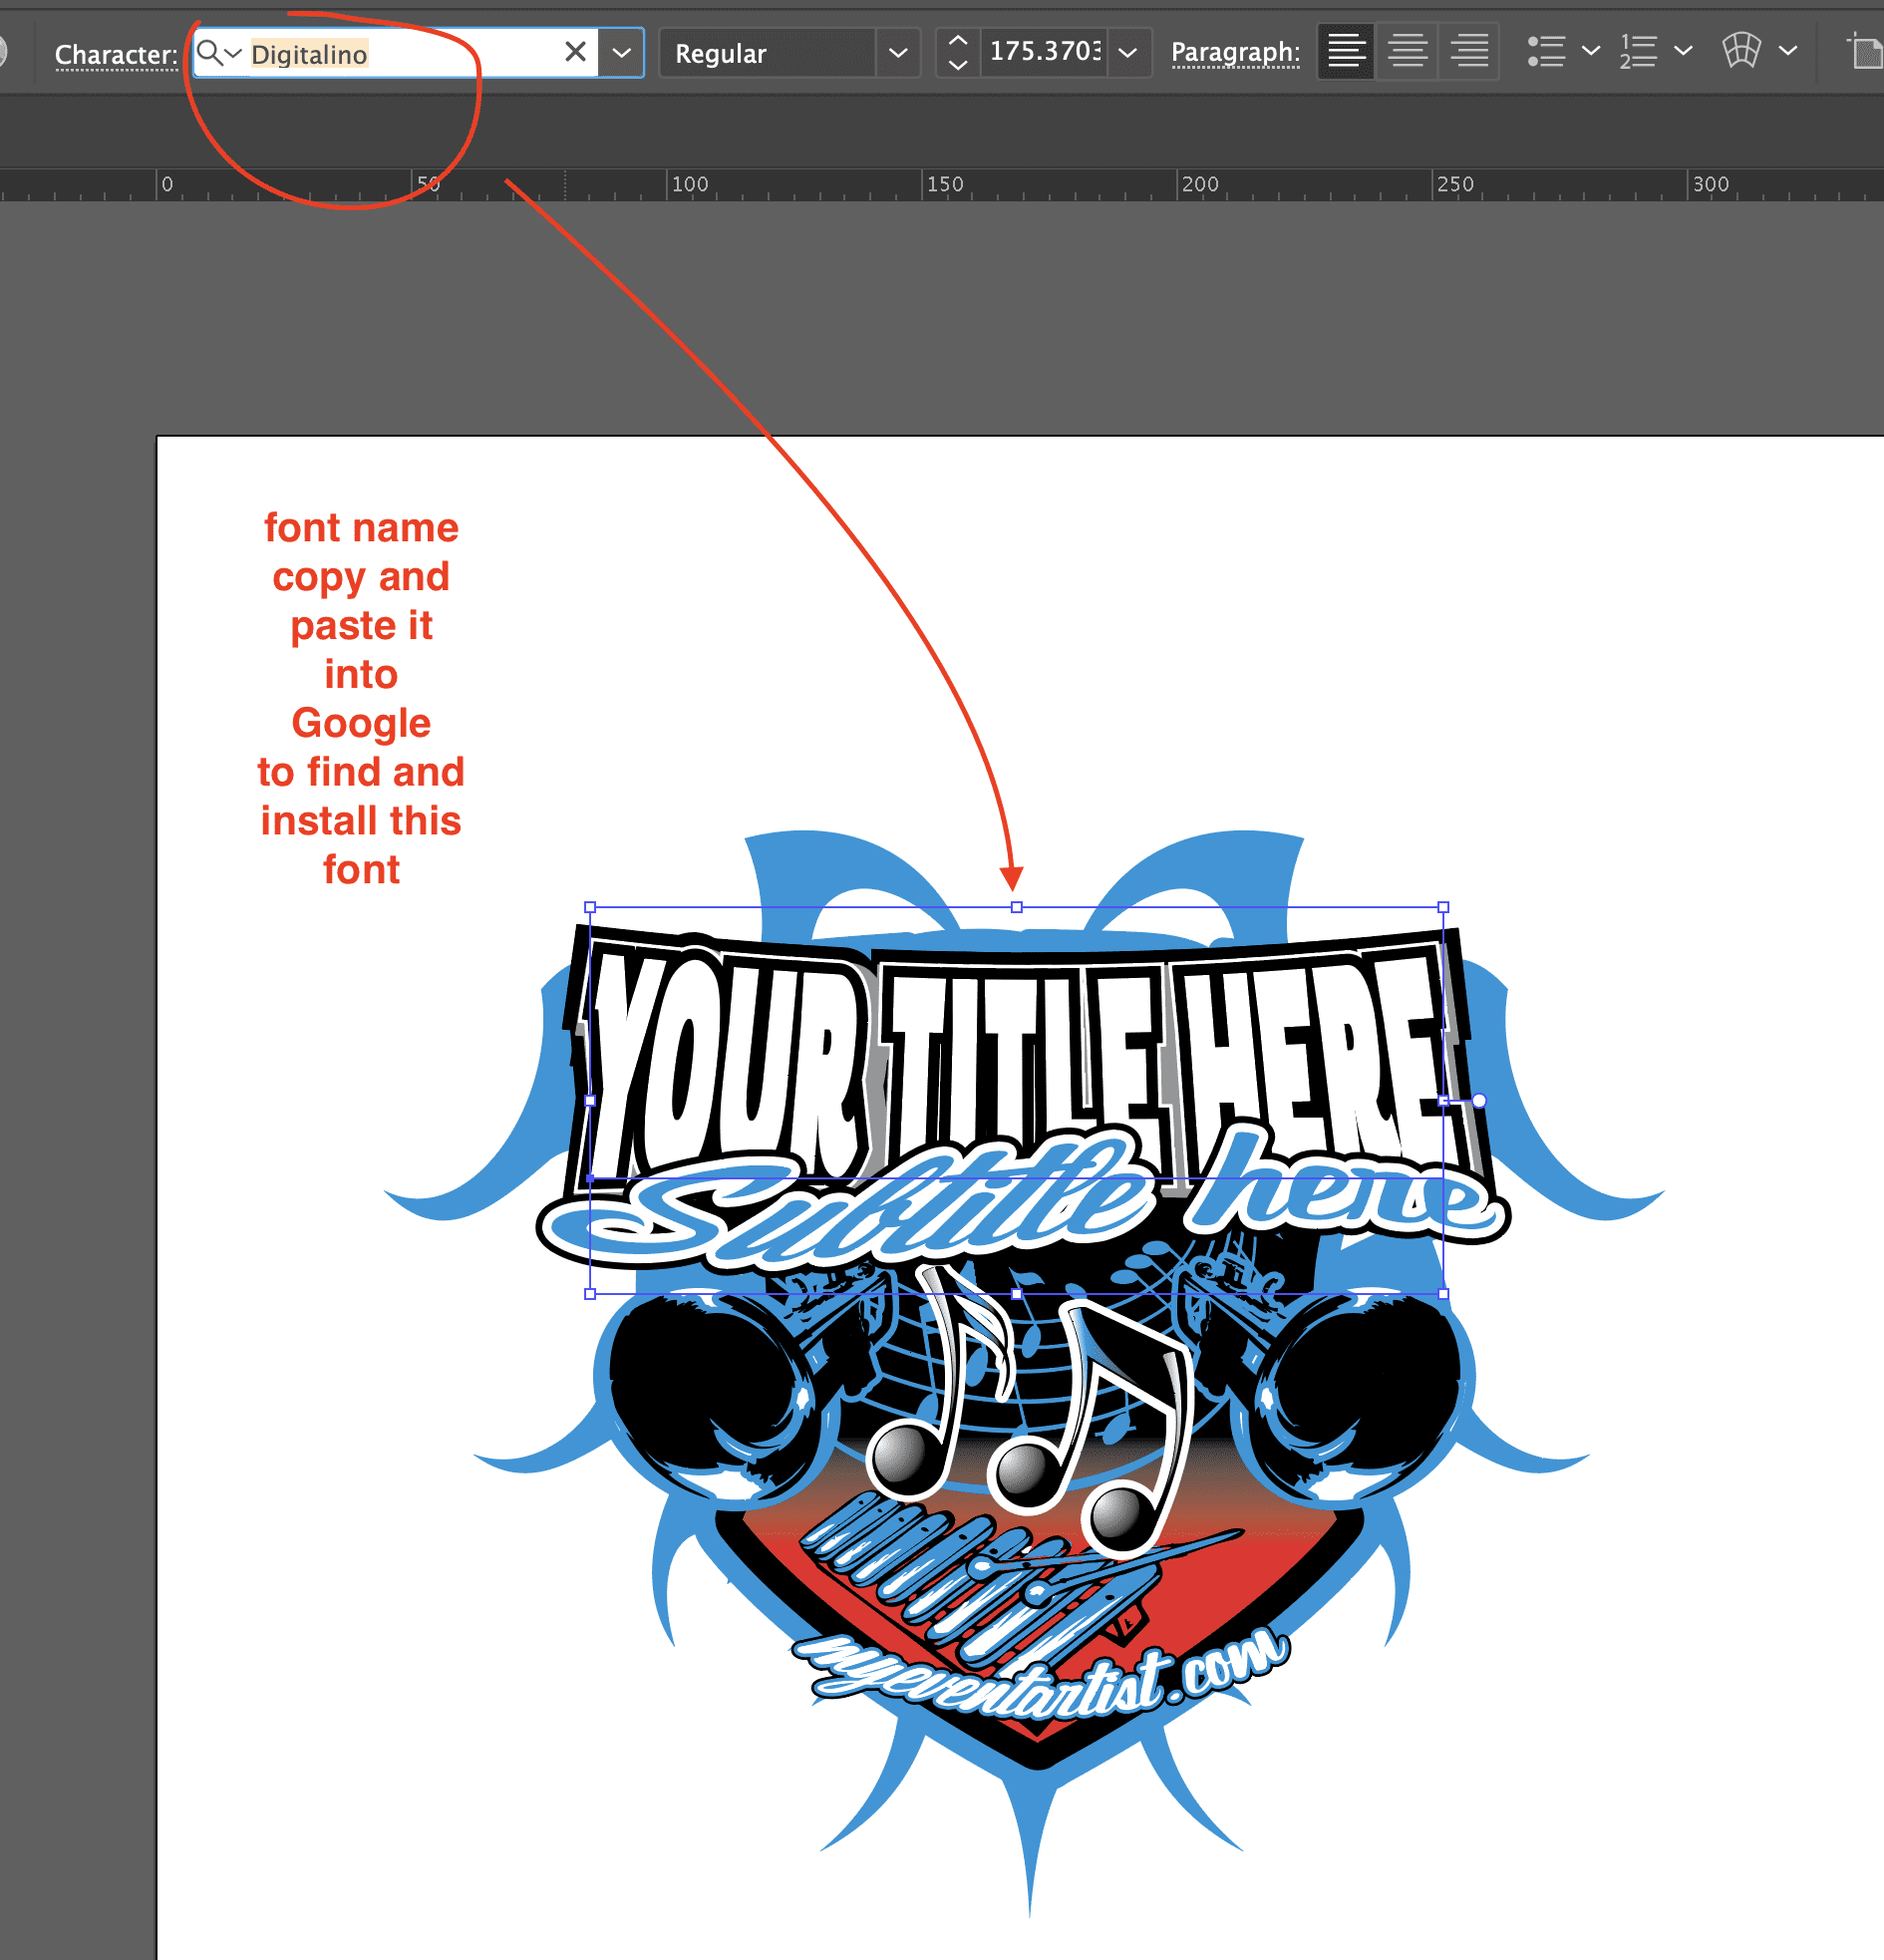
The first step is to identify the missing font in Adobe Illustrator. If you open a document and notice that certain text appears as a default font instead of the desired font, it means the required font is missing. Note down the name of the missing font, as you’ll need this information for the installation process.
Step 2: Locate the Font File
Once you have the name of the missing font, you’ll need to locate the font file. Fonts are typically stored in various locations on your computer, such as the Fonts folder or a specific folder designated by the font’s provider. If you downloaded the font from a website, it’s likely to be saved in your Downloads folder. Use your file explorer (Finder on Mac or File Explorer on Windows) to navigate to the appropriate location.
Step 3: Install the Font
To install the missing font, right-click on the font file and select “Install” from the context menu. Alternatively, you can double-click on the font file to open it, and a preview window will appear. In the preview window, click on the “Install Font” button. This will initiate the font installation process.
Step 4: Confirm Font Installation
After selecting the “Install” option or clicking the “Install Font” button, a system dialog box will appear, confirming the font installation process. Typically, the dialog box will display a preview of the font and provide additional information about it. Click the “Install” button in the dialog box to proceed with the installation.
Step 5: Restart Adobe Illustrator
Once the font installation is complete, it’s essential to restart Adobe Illustrator to ensure that the program recognizes the newly installed font. Save any open projects and close the Adobe Illustrator application. Then, relaunch the program.
Step 6: Verify Font Availability
After reopening Adobe Illustrator, open a document that previously had missing font issues. Check if the font now appears correctly. If the font is listed in the font menu and the previously missing text now displays the desired font, congratulations! You have successfully installed the missing font.
Step 7: Troubleshooting
In some cases, the font may still not appear even after completing the installation process. If this happens, check if the font is supported by Adobe Illustrator. Some fonts may have compatibility issues, particularly if they are outdated or in a format not compatible with the program.
Consider downloading an alternative version of the font or reaching out to the font’s provider for assistance. If the font is supported but still not displaying correctly, double-check the installation steps and repeat them. It’s also worth restarting your computer and ensuring that the font file you downloaded is not corrupt.
Installing missing fonts in Adobe Illustrator is a straightforward process that can save you time and ensure consistency in your designs. By following these step-by-step instructions, you can easily install missing fonts, allowing you to unleash your creativity without any limitations in Adobe Illustrator.

Leave a Reply